

Take a look at the series: VFIO for AMD Hardware
Do you want to run Linux on top of Windows? Or do you want to run Windows on top of Linux? It's a hardware feature!
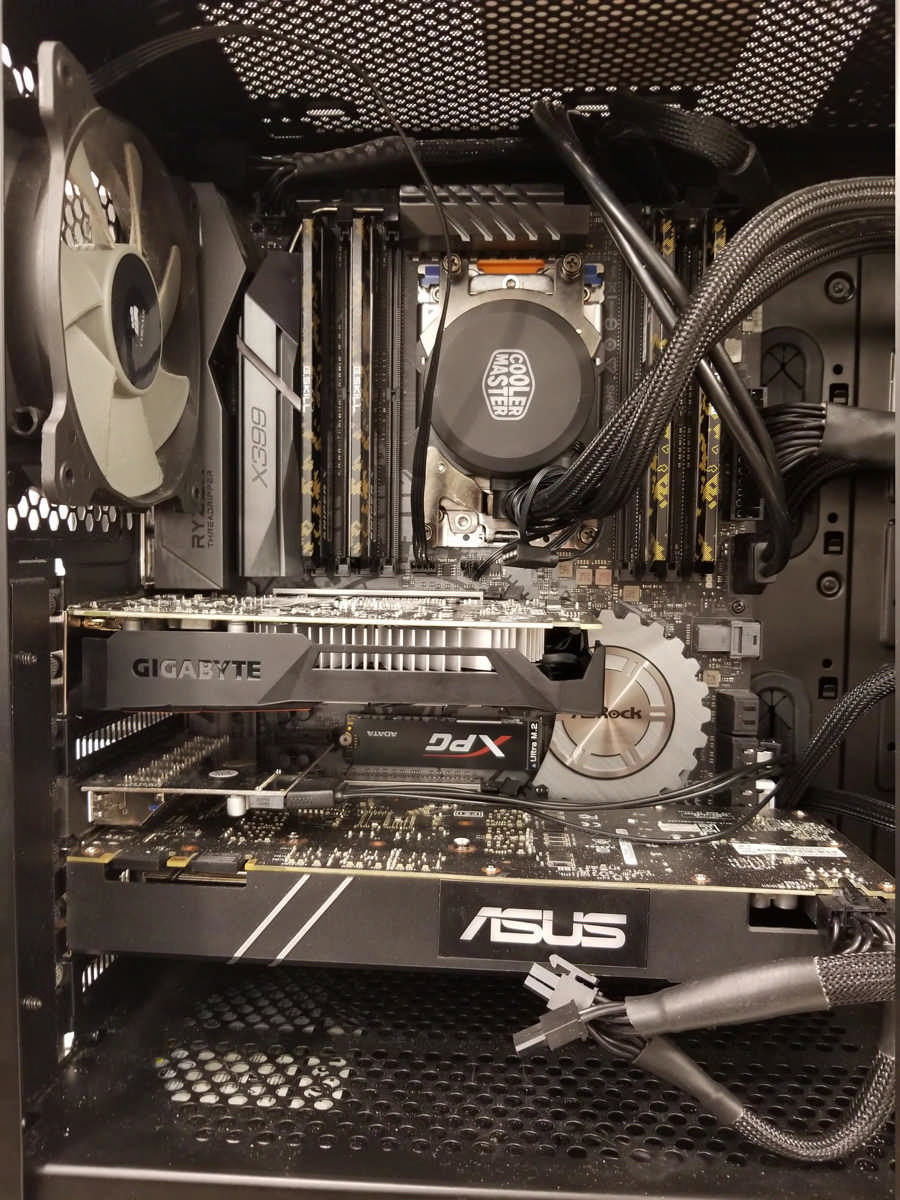
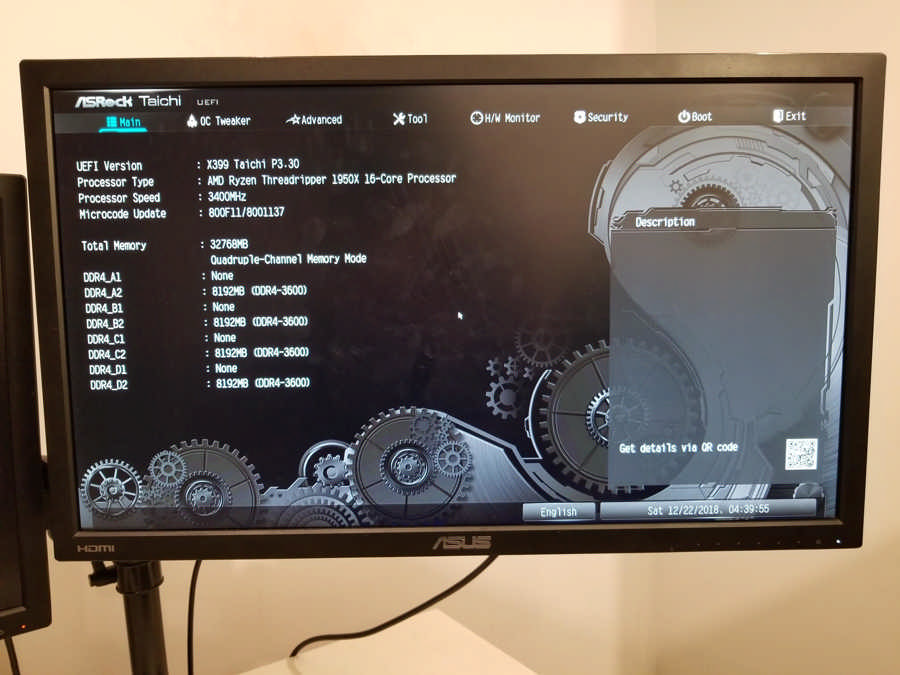
Hi Folks! This is part 1 of a new series involving KVM (Kernel Virtual Machines), VFIO and AMD hardware. To be more specific the X399 platform coupled with a Threadripper 1950X (with lots of cores/threads). Of course, the host OS will be the Fedora 29.
Very CORES, much THREADS. WOW!
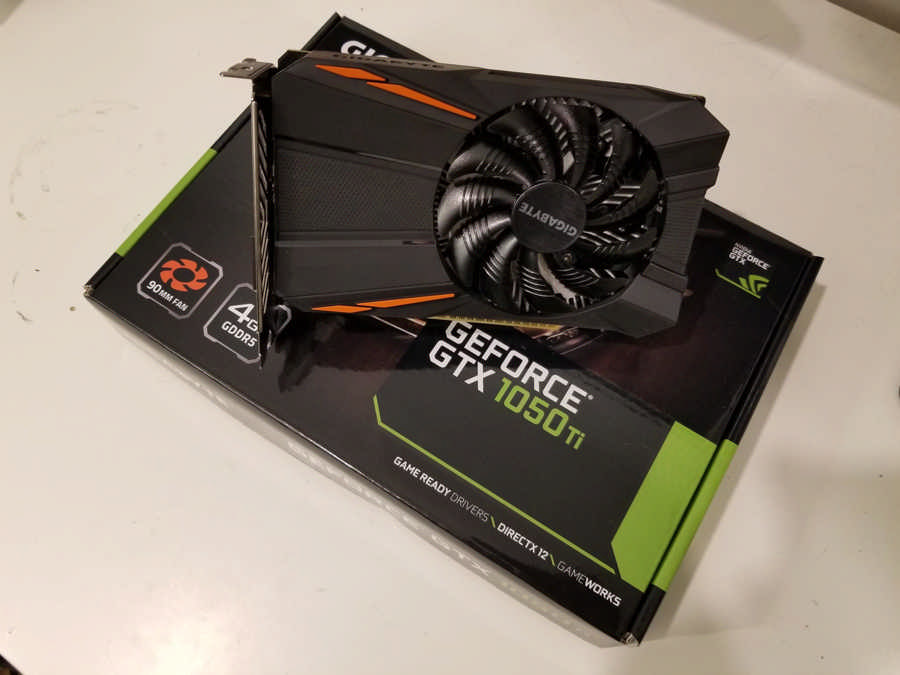
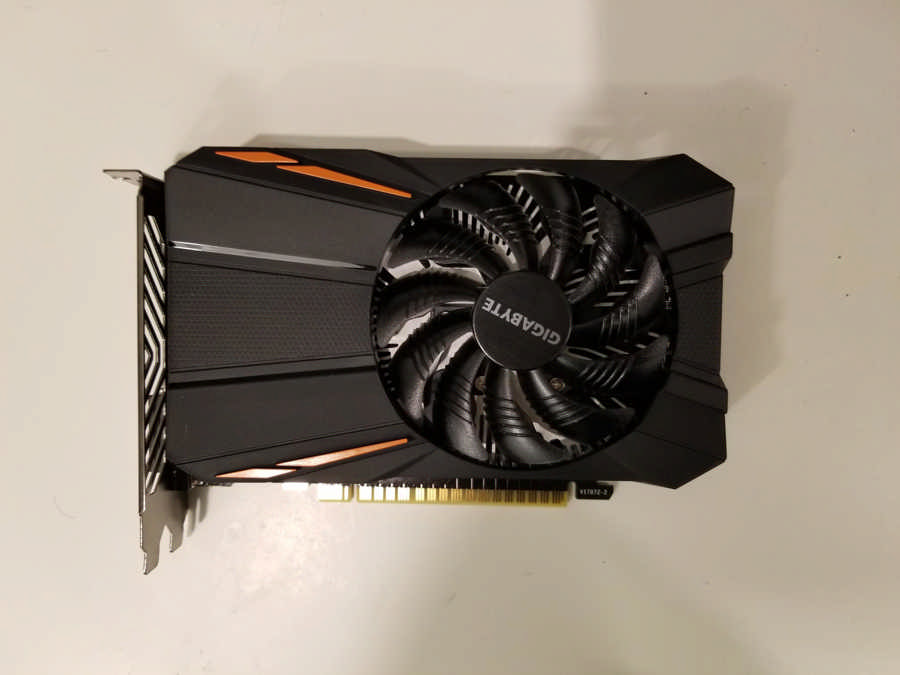
I'd like to start with the struggle I had with a legacy BIOS GPU (my Radeon 7950) installed as the main/boot GPU in my workstation. The answer is pretty simple: you will need 2 UEFI compatible GPUs in order to take advantage of VMs accessing real hardware. Even with an updated version of the BIOS, my workstation would randomly switch between posting on the GPU @ the 1st PCIe slot and the GPU intended for virtualization only (and me trying to unload drivers to force the OS to not register it as a POST GPU in the UEFI process).
It's essential to have 2 UEFI compatible GPUs installed in your workstation.
So there I was at the store, buying another GPU just to work around some Linux OS limitations. I chose to get a GIGABYTE GTX 1050 Ti and the whole setup worked like a charm once again.
If you have INTEL hardware and your processor comes with an iGPU, you won't face the issues mentioned above. You'll only have to configure your PC to post on the integrated GPU instead and have a discrete GPU reserved. That applies to 2nd Generation Ryzen processors as well.
Configuring the BIOS for Advance Virtualization
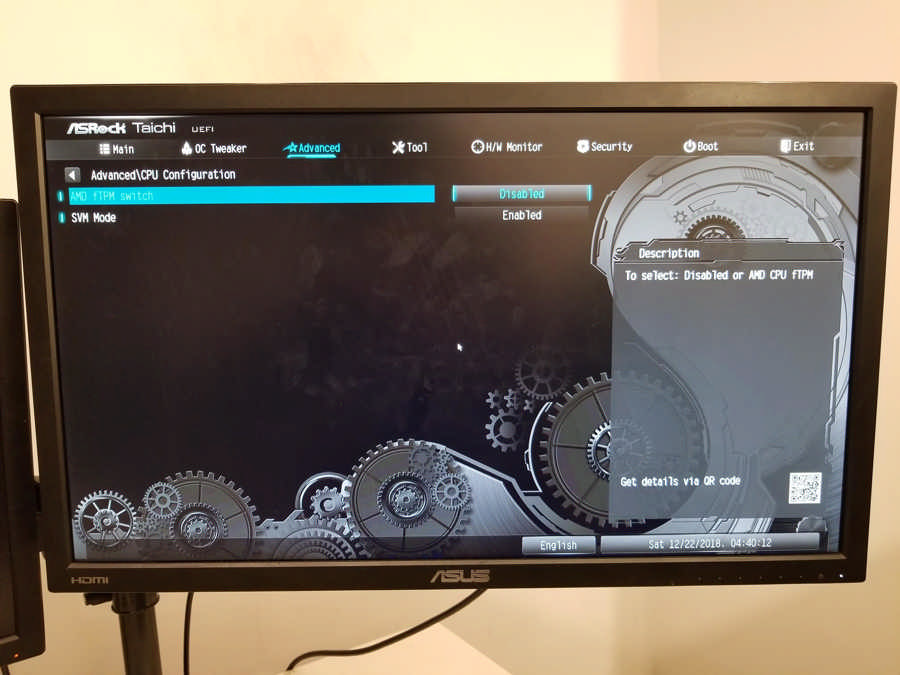
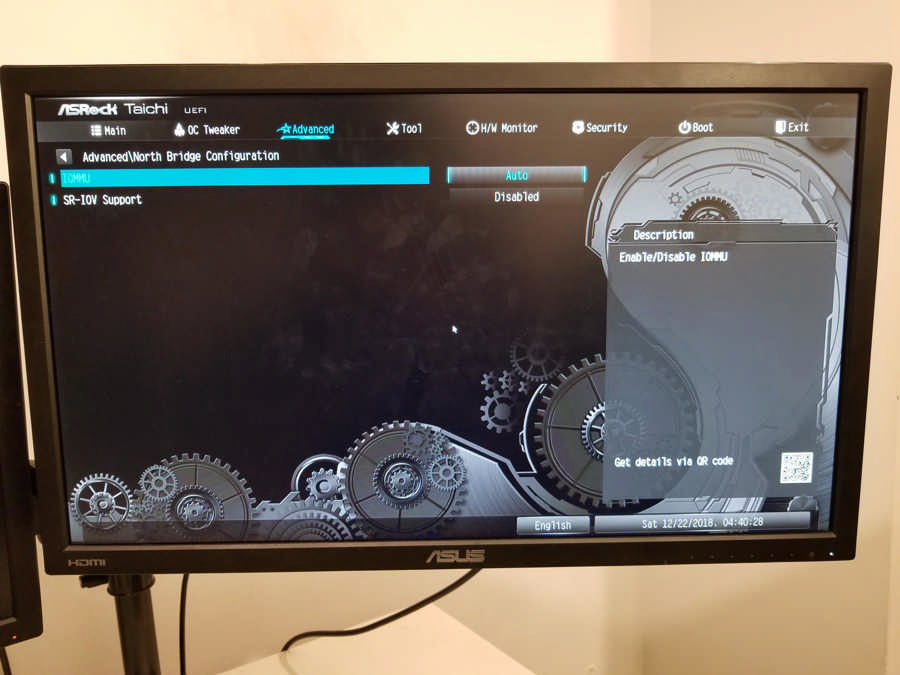
The AMD terminology differs from Intel: instead of VT-d and VT-x, we look for AMD-V hardware. So, just make sure the MOBO supports SVM and IOMMU. I have some pictures of my Asrock X399 Taichi BIOS, showing where to enable the hardware features.
- Update the BIOS in your motherboard (if you're running with an outdated version, you might face "Invalid Header Type" issues when the OS queries your equipment);
- Make sure SVM is enabled;
- Make sure IOMMU is enabled as well;
- Save the changes and reboot your computer.
Preparing the Fedora 29 for VFIO
As of X11 Window Manager 1.20.3 (kernel 4.19.9), you MUST install the linux drive from NVIDIA. Otherwise, you won't be able to login with the X11 visual interface. So please, refer to their website on how to do (it can be fairly complicated, because it involves having to download the kernel-devel and packages meant for compiling stuff).
Don't worry about unloading the NOUVEAU driver after installing the official linux driver, NVIDIA already does that for us.
Check out an overview of the tasks we will follow to setup our Fedoras:
- we need to run a bash script displaying the devices under their respective IOMMU groups;
- we need to obtain Hardware IDs from devices and their PCIe addresses;
- we have to add GRUB parameters to pass kernel parameters at boot time;
- we need to make sure certain kernel modules are loaded at boot time;
- we need to make sure the VFIO driver takes control of devices with intend to passthru;
- last, but not least: we have to make sure the VFIO driver is loaded in and taking over the said PCIe devices;
[1] A bash script for IOMMU Groups
If you are new to the subject, you might be wondering "why do I have to care about IOMMU groups?". Well, IOMMU groups are basically small hardware groups and the VFIO driver needs to access the entire device hierarchy in order to effectively control a device.
For example: in order to pass-thru the USB controllers to a VM I also have to give control of the hardware controlling them... it's kinda confusing right now, but it becomes easier in the future.
IOMMU groups are particular to hardware, so they differ from motherboard to motherboard.
Heck, they may even vary from hardware revision to hardware revision, so make sure you know your equipment.
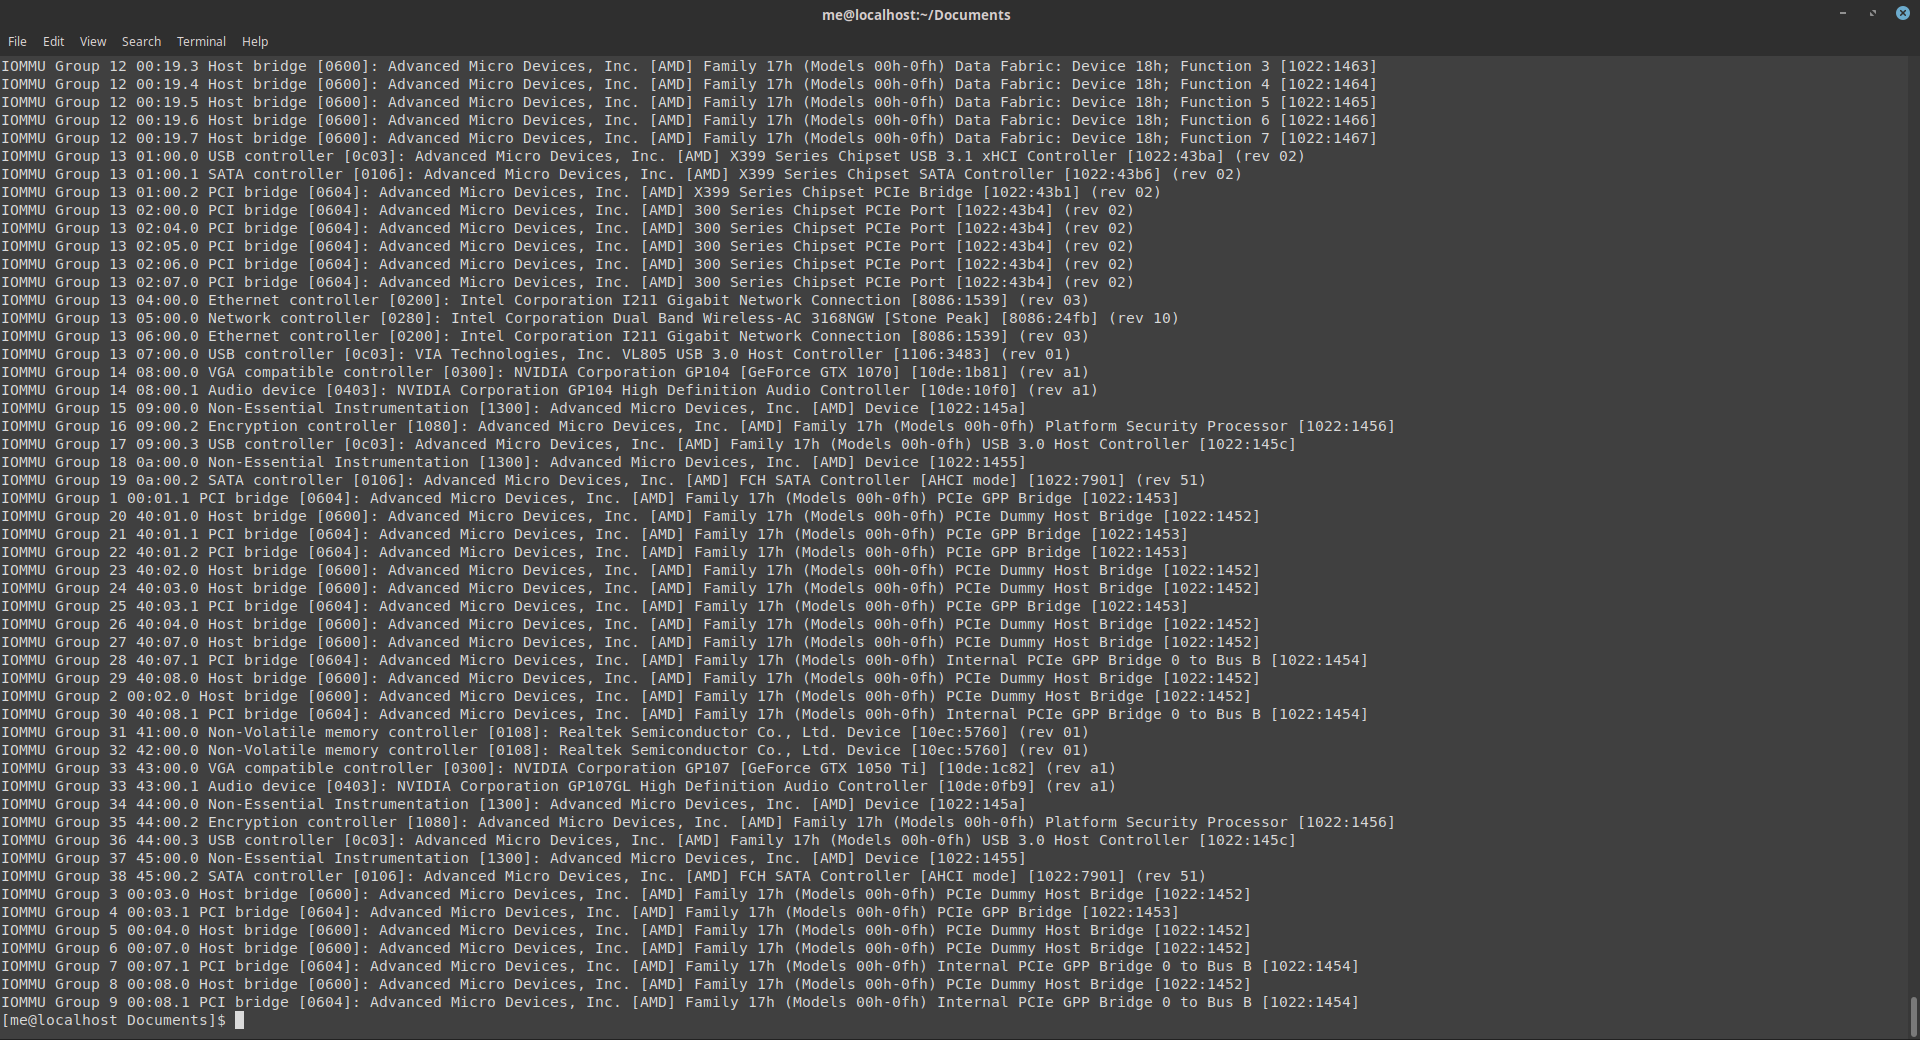
Save the following shell script in a .sh file, give it +x permission via chmod and execute it. Script obtained from this source: https://wiki.archlinux.org/index.php/PCI_passthrough_via_OVMF.
#!/bin/bash
shopt -s nullglob
for d in /sys/kernel/iommu_groups/*/devices/*; do
    n=${d#*/iommu_groups/*}; n=${n%%/*}
    printf 'IOMMU Group %s ' "$n"
    lspci -nns "${d##*/}"
done;
You should see a similar output to this one (again: reference from an ASROCK X399 Taichi):
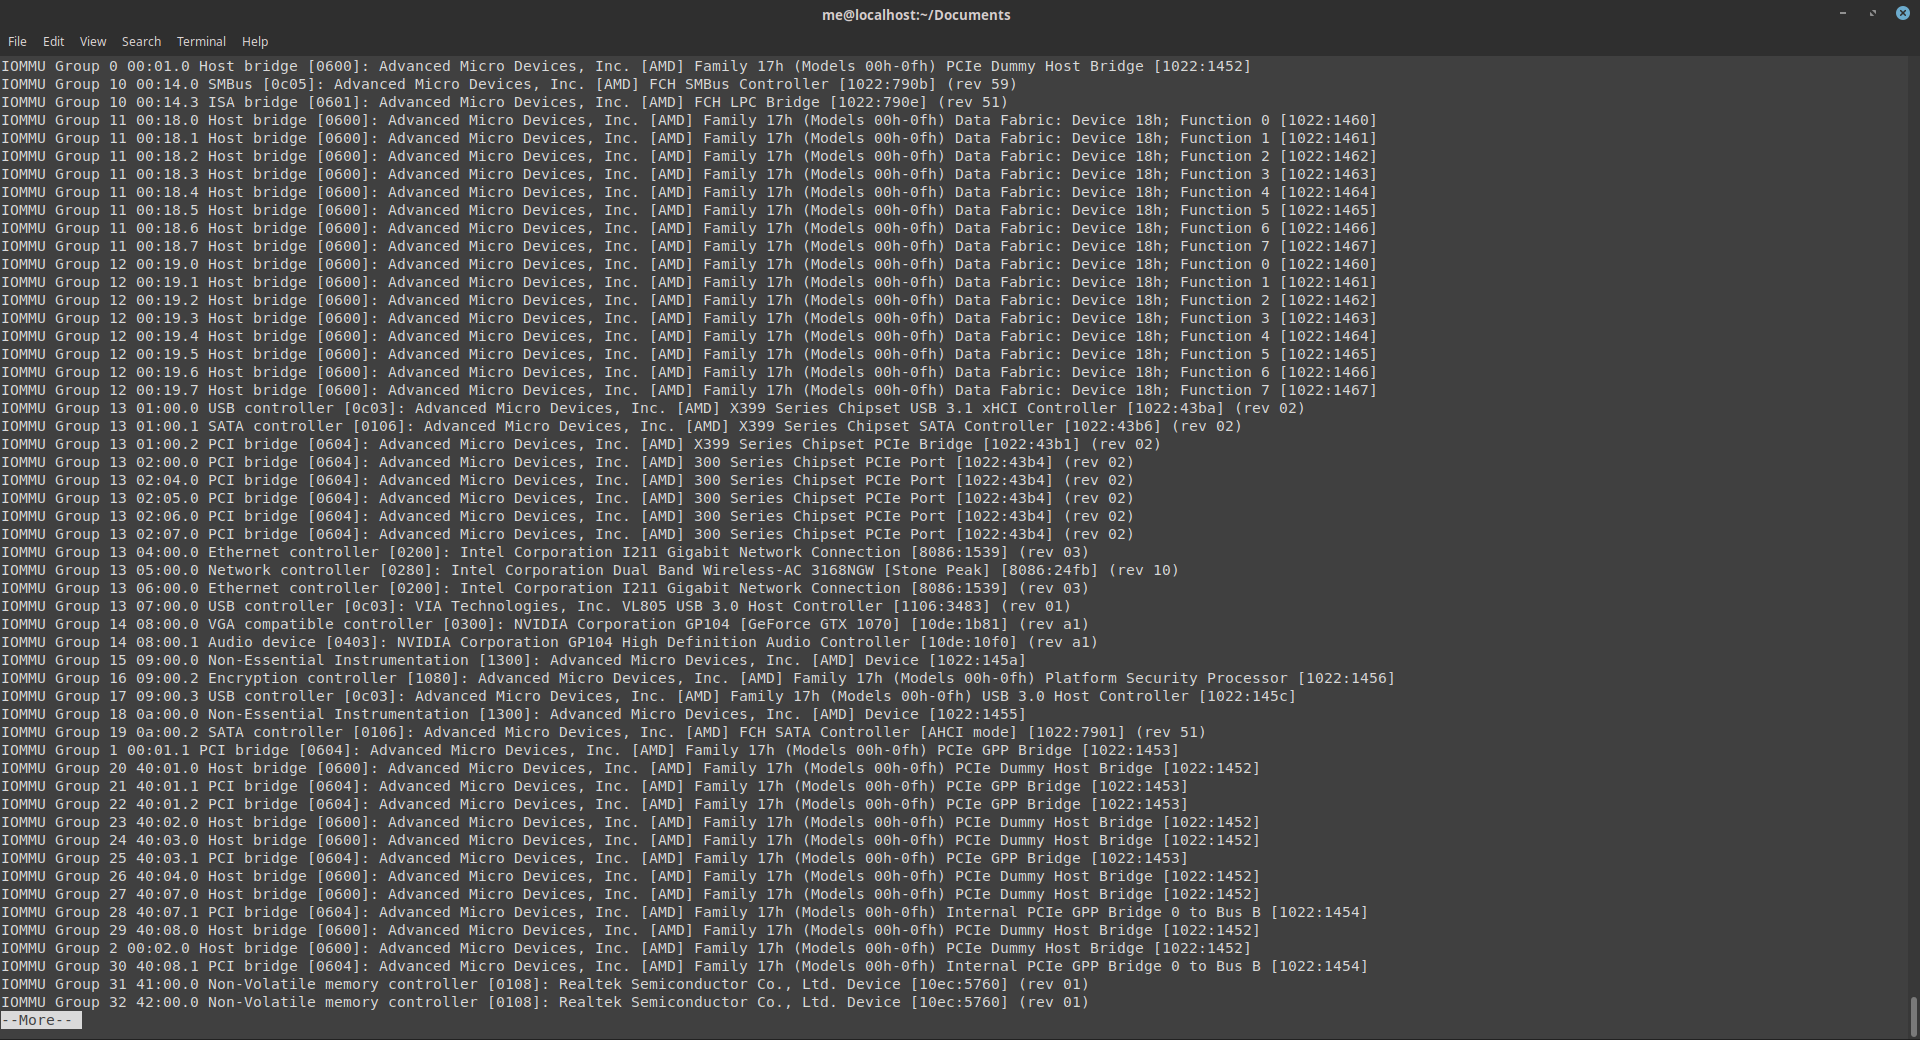
Let's say we wanna use the Intel Dual Band Wireless-AC 3168NGW in a virtual machine, because of reasons... did you notice a few devices listed under IOMMU Group 13? So in order to passthru 1 device, we would have to attach the VFIO driver to EVERY device listed under IOMMU Group 13 (which is unpractical). For internet access in the VM, I bought an USB 3.0 wireless adapter from AMAZON.
Let me tell which devices I am currently using in my Windows VM:
- IOMMU Group 13 - USB Controller @ 07:00.0, Hardware ID 8086:1539;
- IOMMU Group 17 - USB Controller @ 09:00.3, Hardware ID 1022:145c;
- IOMMU Group 14 - GTX 1070 @ 08:00.0, Hardware ID 10de:1b81;
- IOMMU Group 14 - GTX 1070 @ 08:00.1, Hardware ID 10de:10f0;
[2] Querying the devices for their PCIe addresses and Hardware IDs
Well, we basically went through the second step by listing the devices above. I wrote down the Hardware IDs for later.
[3] Editing the default GRUB parameters
You have to add the following parameters to the /etc/default/grub, specifically at the end of GRUB_CMDLINE_LINUX: "amd_iommu=fullflush amd_iommu_dump=on rd.driver.pre=vfio-pci iommu=pt kvm_amd.avic=1 rd.driver.pre=amd_iommu_v2".
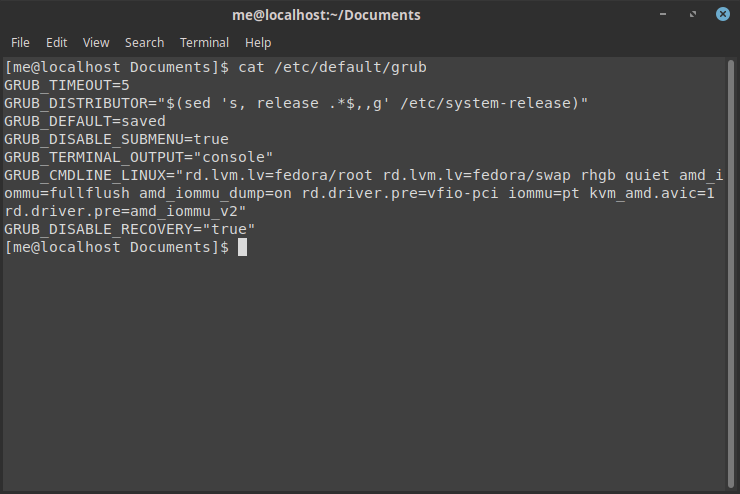
Now, update your grub2 boot configuration file, by executing grub2-mkconfig and setting the output to the file @ /boot/efi/EFI/fedora/grub.cfg.
[4] Adding VFIO drivers to KERNEL image (dracut)
We need to create 1 configuration file (with root privileges):
- /etc/dracut.conf.d/00_vfio.conf
Add the following line:
add_drivers+="vfio vfio_iommu_type1 vfio_pci vfio_virqfd"
[5] Telling which devices we will give control over to the VFIO driver
We need to create 1 configuration file (with root privileges):
- /etc/modprobe.d/00_vfio.conf
Add the Hardware IDs to the 2nd file (your file should look like the following):
#nvidia gtx 1070
options vfio-pci ids=1022:1452,1022:1454,1022:145a,1022:1456,1022:145c,10de:1b81,10de:10f0
Last, but not least: execute the dracut -f command to force the OS to create new & updated kernel images. Finally, it's time to reboot your PC.
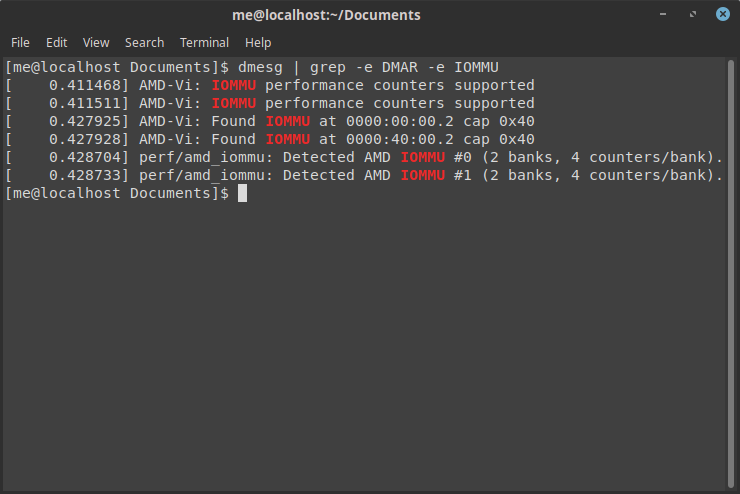
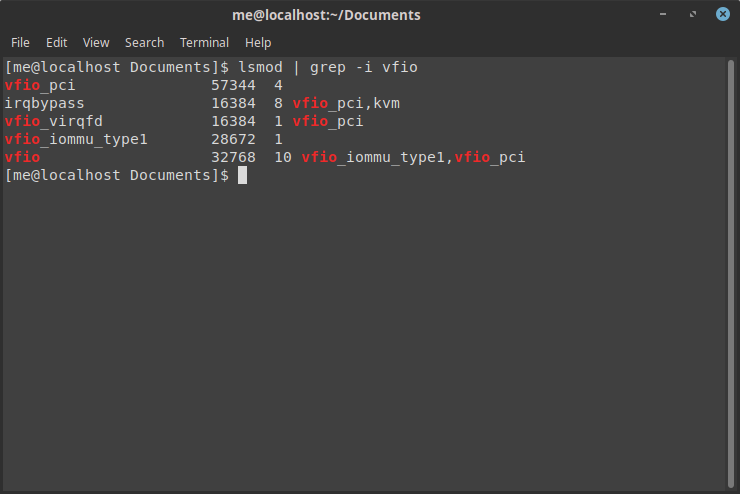
[6] Making sure it's a go-go
Let's execute 2 commands in the Linux shell to verify whether everything went right or not:
dmesg | grep -e DMAR -e IOMMU
lsmod | grep -i vfio
You should have a similar output to these:
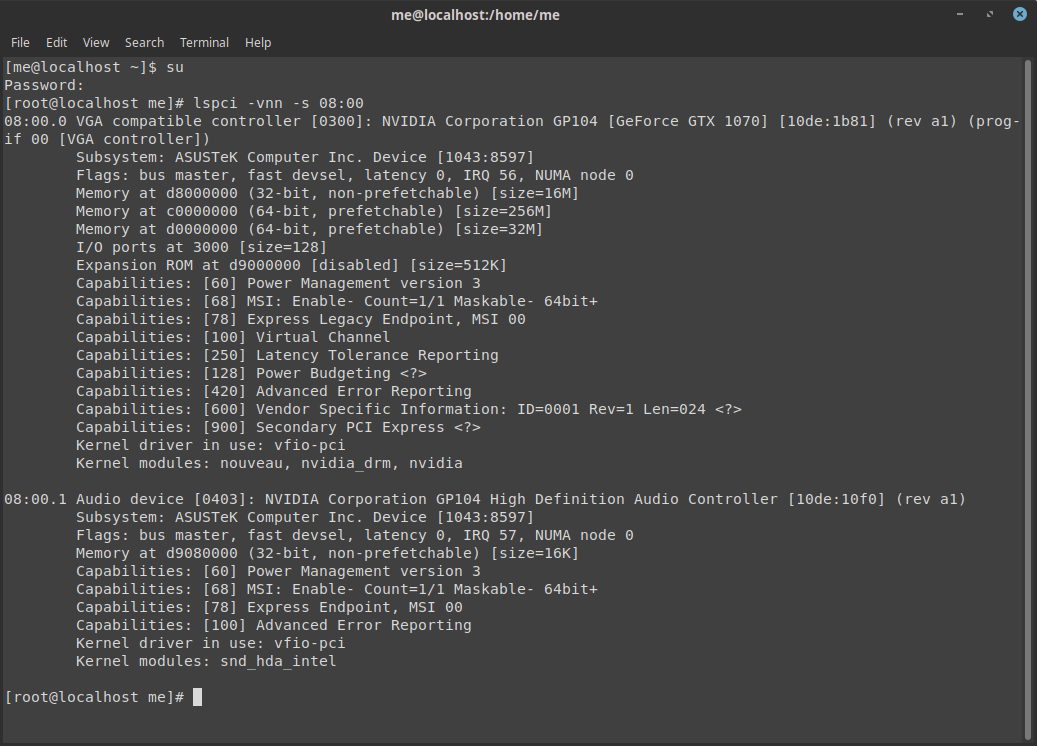
Now, take the time to check whether the VFIO PCI driver has taken over the devices you intend to virtualize, by executing the following command:
lspci -vnn -s 08:00
Well, in the next article I will be going through the steps of creating a Windows VM using the Virtual Machine Manager.
Enjoy!